Run all commands in Powershell as Admin.
Firewall Configuration
Enable ICMP
- Windows Defender Firewall >
- Advanced Settings >
- Inbound Rules (Left) > New Rule… (Right) >
- “New Inbound Rules Wizard – Rule Type”
- ( * ) Custom
- [ Next > ]
- “New Inbound Rules Wizard – Program”
- ( * ) All programs
- [ Next > ]
- ““New Inbound Rules Wizard – Protocols and Ports”
- Protocol type:
ICMPv4 - Local port: All Ports (Default)
- Remote port: All Ports (Default)
- [ Next > ]
- Protocol type:
- “New Inbound Rules Wizard – Scope”
- Which local IP addresses does this rule apply to?
- ( * ) Any IP address
- Which remote IP addresses does this rule apply to?
- ( * ) Any IP address
- [ Next > ]
- Which local IP addresses does this rule apply to?
- “New Inbound Rules Wizard – Action”
- ( * ) Allow the connection
- [ Next > ]
- “New Inbound Rules Wizard – Profile”
- [ x ] Domain
- [ x ] Private
- [ x ] Public
- [ Next > ]
- “New Inbound Rules Wizard – Name”
- Name:
Ping ICMPv4 - [ Finish ]
- Name:
Allow WinRM (HTTP – 5985)
- Windows Defender Firewall >
- Advanced Settings >
- Inbound Rules > Scroll down to “Windows Remote Management (HTTP-In)” Profile->Public and double click.
- General tab:
- [ x ] Enabled
- Action:
- ( * ) Allow the connection
- Scope tab:
- Local IP Address:
- ( * ) Any IP Address
- Remote IP Address:
- ( * ) Any IP Address
- ^^ This is the stumper!! ^^
- ( * ) Any IP Address
- Local IP Address:
- [ Apply ]
- [ OK ]
- General tab:
Allow WinRM (HTTPS – 5986)
Create a custom inbound rule based on the Port.
- Inbound Rules (Left) > New Rule… (Right)
- “New Inbound Rules Wizard – Rule Type”
- ( * ) Port
- [ Next > ]
- “New Inbound Rules Wizard – Protocols and Ports”
- Does this rule apply to TCP or UDP?
- ( * ) TCP
- Does this rule apply to all local ports or specific local ports?
- ( * ) Specific local ports:
5986
- ( * ) Specific local ports:
- [ Next > ]
- Does this rule apply to TCP or UDP?
- “New Inbound Rules Wizard – Action”
- ( * ) Allow the connection
- [ Next > ]
- “New Inbound Rules Wizard – Profile”
- [ X ] Domain
- [ X ] Private
- [ X ] Public
- [ Next > ]
- “New Inbound Rules Wizard – Name”
- Name:
Windows Remote Management (HTTPS-In) - [ Finish ]
- Name:
Create a Non-Admin User
Create the User
- Windows Icon > Settings
- Accounts > Other Users > Add someone else to this PC
- Users (Left) > More Actions (Right) > New User…
- User name:
zenmonitor - Full name:
Zenny Zenmonitor - Description:
Non-admin WinRM User - Password:
******** - Confirm Password:
******** - [ _ ] User must change password at next logon. (Uncheck)
- [ X ] Password never expires
- [ Create ]
- [ Close ]
- User name:
Grant User Roles
User roles are added by adding the users to the correct groups.
- Groups (Left) > Remote Desktop Users (Center) > Double click
- “Remote Desktop Users Properties”
- [ Add ]
- “Select Users”
- Enter the object names to select
- Type the user name (ex. zenmonitor) in the area box
- [ Check Names ]
- This will locate the user and replace the name with the Windows user object
servername\username
- This will locate the user and replace the name with the Windows user object
- [ OK ]
- Enter the object names to select
- “Remote Desktop Users Properties”
- You should now see your user in the Members field.
- [ Apply ]
- [ OK ]
- Optional: Repeat to add the Remote Manager Users Group
- This step may not be required since it appears it is completed using the zenoss-lpu.ps1 script
Configure WinRM
Confirm WinRM is running and listening
WinRM e winrm/config/listener
If WinRM is NOT running, run WinRM Quickconfig
- This will ONLY configure WinRM for HTTP/5985.
winrm quickconfig
Check again
WinRM e winrm/config/listener
Allow Basic Authentication
This allows a local user to access the system
Check the WinRM Configuration
winrm get winrm/config
Confirm Basic Authentication is Allowed
- Config > Service > Auth > Basic = true
- If Basic = false, enable it
winrm s winrm/config/service/Auth '@{Basic="true"}'
Confirm Unencrypted Monitoring is Allowed (Optional)
- Config > Service > AllowUnencrypted = true
- If
AllowUnencrypted = false, enable it.
winrm s winrm/config/service '@{AllowUnencrypted="true"}'
Configure a Self-signed certificate
These steps are only required if using WinRM HTTPS (5986)
Create the certificate.
- Replace
<YOUR_DNS_NAME>with the FQDN you wish to use.- Yes, this can be fake.
mywindoze.zenoss.pocis acceptable.
- Yes, this can be fake.
New-SelfSignedCertificate -DnsName "<YOUR_DNS_NAME>" -CertStoreLocation Cert:\LocalMachine\My
After running this command, note the Thumbprint. We’ll use this in the next step.
Register the new cert with the HTTPS listener in WinRM
- Replace both
<YOUR_DNS_NAME>and<CERTIFICATE_THUMBPRINT>with the correct values.
winrm create winrm/config/Listener?Address=*+Transport=HTTPS '@{Hostname="<YOUR_DNS_NAME>"; CertificateThumbprint="<CERTIFICATE_THUMBPRINT>"}'
Verify WinRM is now listening on both 5985 and 5986
WinRM e winrm/config/listener
Add the required Least Privilege User permissions to the user
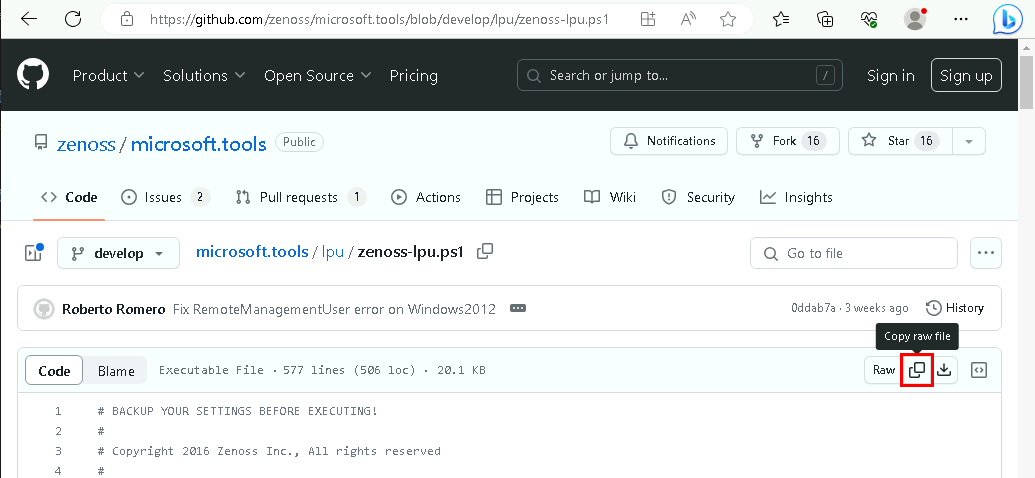
From the Windows server, open the following URL in a browser:
Copy the contents of the script from the browser.
- Hint: There is a copy button on the upper right corner.
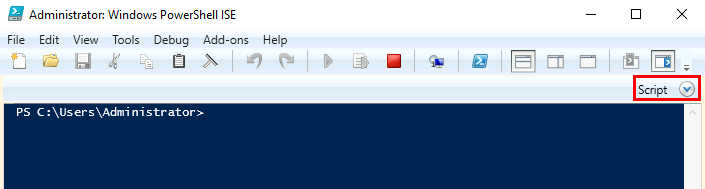
Open PowerShell ISE as an Administrator and paste the contents into the script pane section
- Hint: You might need to click the ‘Scripts’ option in the upper right side of PowerShell ISE to view the script pane.
- Main Menu – Edit > Paste
Comment out lines 427 and 577 by placing a ‘#’ at the beginning of each line
- Failure to comment out these lines will prevent the script from running.
Save the changes
- File > Save As… > Documents
- File name: zenoss-lpu.ps1
- [ Save ]
In the command line portion of the window (dark blue area), run your script.
- Make sure you replace <USERNAME> with the name of the non-admin user you created.
.\Documents\zenoss-lpu.ps1 -u <USERNAME> -f
- The script takes several minutes to run.
- You will likely see a lot of errors. This is OK. These are generated by the script as it is testing the system’s configuration.
- When the script completes, you should see a notice that the permissions had been granted.
Troubleshooting
Waiting for Service errors:
If you see:
WARNING: Waiting for service ‘User Access Logging Service (URALSVC)’ to start…
WARNING: Waiting for service ‘User Access Logging Service (URALSVC)’ to start…
WARNING: Waiting for service ‘User Access Logging Service (URALSVC)’ to start…
...
- Press
[Ctrl]+[ C ]to stop the script - Press the UpArrow to display the last command:
.\Documents\zenoss-lpu.ps1 -u <USERNAME>
- Press [ Enter ] to rerun the script.
Model Failing Issues
If you see “Unable to connect to WinRM” or something similar:
- Check all “Sanity Checks” below
- If everything looks good, reboot the Windows Server.
- Rebooting the server is not uncommon.
Sanity Checks:
- Verify you can telnet to the server’s IP address on port 5985
- Verify you can telnet to the server’s IP address on port 5986
- If this fails, you should:
- Verify the server is listening on 5986
WinRM e winrm/config/listener
- Verify the port has been opened on the firewall and allows traffic from your IP address.
- Verify the server is listening on 5986
- If this fails, you should:
Optional Configurations
Install Telnet
- Server Manager > Dashboard > Add Roles and Features
- “Before you begin”: [ Next > ]
- “Installation Type”:
- ( * ) Role-based or feature-based installation
- [ Next > ]
- “Server Selection”
- ( * ) Select a server from the server pool
- Leave default
- [ Next > ]
- ( * ) Select a server from the server pool
- “Server Roles”
- Leave all defaults
- [ Next > ]
- “Features”
- [ X ] Telnet Client
- [ Next > ]
- “Confirmation”
- [ Install ]